Let me start this article by saying that Sonos is good. Sonos is REALLY good. There’s a reason why their name has become synonymous with multi-room audio, even reaching the level of ubiquity enjoyed by brands like Kleenex and Coke.
When people think of a whole home audio system, they call it a “Sonos System,” regardless of the manufacturer, and there’s a good reason for this. Not only was Sonos the first company to get multi-room right by simplifying all the intricacies of latency and delay, they single-handedly brought that Apple “Automagic” element into the space.
At Audilux, probably 90% of our multi-room installs incorporate Sonos in one way or another. It just works, but the recent supply chain issues and very tight constraints on Sonos’ most popular product for installation (the Amp) left me wondering if anyone else could deliver a similar experience.
A cottage industry of competition has sprung up since Sonos began its undisputed reign, each with varying levels of success. We’ve tested everything from Denon/Marantz’s Heos System, Yamaha Musicast, and even some DIY options. While many are functional, no one has been able to effectively replicate Sonos’s ecosystem until now.
Enter BlueSound, a new to us outfit that’s part of Canadian audio conglomerate Lenbrooke. Thanks to a collaborative relationship between sister brands BlueSound products share amplification technology from audiophile legends NAD.
Bluesound has squarely targeted customers who care about audio quality. They’re not trying to be a “Great Value” Sonos knockoff but rather a slightly more upscale alternative for people who value performance above all. But, of course, in our current environment, they’re also an excellent option for someone who wants a system now rather than waiting months on inventory fulfillment.
Let’s take a quick look at their various offerings, see where BlueSound bests the reigning champion, and where Sonos is still in a league of their own.
Streamers:
Node:
The BlueSound Node Streamer
The Node is is a streamer that competes directly with the Sonos Port as a way to get streaming audio into your home audio system. $599
Hub:
BlueSound Hub Local Audio Source
The hub isn’t really a streamer but is kind of a unique offering that allows you to bring an audio source into your Blue Sound network. You can install this behind a TV or pair it with a turn table. $319
Streamers with built-in amps:
Power Node:
BlueSound Power Node Steamer with Amp
The Power Node is the BlueSound alternative to the Sonos Amp. It’s functionally very similar, but offers an upgraded signal path, hi-resolution audio, and plenty of power. $949
Power Node Edge:
BlueSound Power Node Edge
If you have a room that you’d like to incorporate into your system but don’t need quite as much power, the Power Node Edge is a great way to add a room without breaking the bank. Just announced in September of 2022, the Power Node Edge is only $650.
Looking for a Sonos Alternative? We found it. 12
Soundbars:
The BlueSound Soundbar+
BlueSound has one sound bar option, the Soundbar+. This is, simply put, the best-sounding Soundbar I’ve ever heard. While soundbars are always an upgrade over pint-sized built-in TV speakers, the Soundbar+ is actually capable of enjoyable music playback and has a reasonable amount of bass.
Looking for a Sonos Alternative? We found it. 13
It’s physically taller than most at 5.5″ tall but also considerably more shallow. A wall mount is included in the box at no extra cost, and just like the Sonos Arc, the Soundbar+ offers a way to pipe your TV’s audio into the rest of your home.
At $899, it’s a great alternative to the Arc.
Portable Speakers:
Flex:
BlueSound Flex Portable Speaker
Mini:
BlueSound Mini Speaker
Pulse:
BlueSound Pulse 2iBlueSound Pulse 2i
What you get with both BlueSound & Sonos:
Reliable low-latency audio across your entire home
Wireless and wired connectivity
Sexy, well-designed applications for your phone
Voice assistant control from Alexa, etc.
If any of the following are you, you should stick to Sonos:
You’re an Apple Music user. Sonos has the monopoly on interfacing with Apple Music, and being forced into using Airplay is no fun.
You aren’t subscribed to premium streaming sources and want to access Sonos’s vast library of radio stations. They’re very high-quality curated programming and don’t cost anything.
You want the most extensive array of device options. Sonos has more models available to custom-tailor a system for your home.
Cost is the deciding factor. While the two ecosystems’ pricing is close, Sonos is around 10-20% cheaper overall.
Final Thoughts and Conclusion
At the end of the day, if someone asks for Sonos, that is definitely plan A. They’re still the de facto standard for a good reason, and we know we’re installing a tried and true product that won’t lead to callbacks.
But, if they ask for “Sonos”and need it right now, or they’re looking for the next level in audio quality, we’re happy to have another solid option. Perhaps we could introduce you to our new friend from Canada, BlueSound.
If you have any questions about BlueSound products or need help designing a system for your home, please feel free to reach out! We’d love to put together a custom solution for you.
In the latest installment of our series of no-nonsense architectural speaker reviews, we turn our attention from the Brits at Kef to the profoundly French Focal 300 IW6 LCR in-wall speaker Oui, Oui!
Table of Contents
About the 300 Series
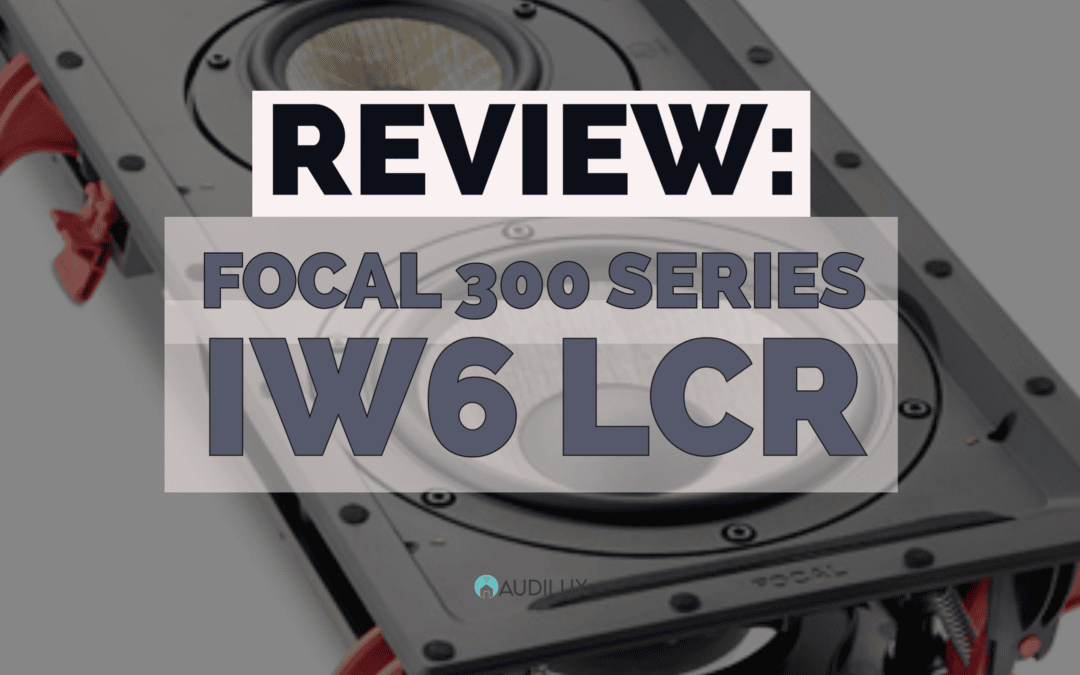
Focal 300 IW6 In-Wall Speaker
Starting with nerdy essentials, each Focal 300 IW6 LCR comes loaded with dual 6 1/2″ Woofers, a 4″ Mid-range, and a 1″ aluminum/magnesium tweeter.
The 300 series marks a manufacturing transition point in Focal’s custom install line, assembling all models in the same factory in France that produce their high-end signature products like Kanta, Sopra, etc.
The 300 IW6 LCR shares a lineage with Focal Kanta
Focal claims these are “coherently aligned” with their Kanta towers utilizing the same woven flax cone material but a different tweeter configuration. This makes them a perfect complement to a two-channel Kanta system when perhaps floor space or budget prevent placing full-size speaker cabinets throughout the room.
In both of our most recent installs, we decided to build MDF back boxes for the speakers since they were installed behind fabric in one case and an acoustically transparent screen in another.
Back Boxes from our Shelter Theater BuildFocal 300 IW6 LCR in MDF Back Boxes
Unfortunately, Focal doesn’t provide any guidance for enclosure volume, but based on our experience with other similar units, we opted for roughly two cu ft and were pleased with the result.
Installation is simple and makes use of Focal’s “Easy Quick Install” system. Rather than relying on traditional speaker dogs and screws, Focal uses eight high-tensioned plastic spring clips to securely hold the speakers in place.
As long as you make use of the included template to cut out your openings, it really does take less than a minute to install each speaker.
A word to the wise, these are a little less forgiving than speaker dogs, so leave at least an inch and a half between the sides of your opening and any framing members.
Finished Install Awaiting TV InstallationIllustration showing speakers installed behind a Screen Innovations Projector Screen
Sound Performance:
Full stop; you will not be disappointed. In our test environment, not only did the IW6 LCRs exhibit the signature “Focal” sound, but they also offered low-frequency extension I’ve yet to experience from any other open-back architectural speaker.
Again, I’m not claiming these could go toe to toe with a set of gargantuan hi-fi towers, but they certainly qualify as full-range, which is in and of itself quite a feat for an in-wall speaker. When paired with a capable sub, the end result is fantastic and nearly invisible.
Bass performance is going to vary greatly depending on the volume of your enclosure, but in the average 8ft – 10ft wall should be more than adequate, and it will be even better with a properly sized MDF enclosure.
Tasting Notes:
If you haven’t had a chance to experience the timber of Focals in person, I will describe their midrange to low-frequency crossover as exceptionally smooth and well-engineered.
Their tweeters tend to be a bit more on the sweet or articulate side, but there is a pad for you to EQ to taste if you prefer a more mellow top end. It’s a bit more forward than something like Kef’s UniQ but never sibilant or sizzly.
Value:
With a price of $1199 each, are they worth it?
I think these speakers occupy a comfortable spot at the edge of a precipice. The 300 series offer a step into the world of true audiophile sound in a compact in-wall package. Yes, at a higher price point, there is room to improve.
If you have a larger space, budget, or want the very best, there are next-level options out there (The Focal 1000 Series or Kef Reference come to mind), but for most people, the 300 series represent an investment that’s easy to justify by both their pedigree and sound quality.
If you’re starting a new home automation or AV project, here are a few ways to prepare yourselfthe situation at hand.
Communication is critical.
Having clear expectations and 100% transparency regarding time frames for equipment arrivals and project start dates is essential. We try to accomplish this by providing regular updates from vendors and informing our customers of the current environment from day one.
While we all thought many supply constraints were beginning to ease, that hasn’t been the case with some categories. AV receivers, for example, can still have a lead time ranging from several weeks to several months, depending on the model. Also, try your best to be open to product substitutions if time is of the essence.
Prepare to be invoiced upfront
Nobody likes being charged upfront and waiting to receive what they’ve already paid for. We get it. The reality is that some vendors are now billing for back-ordered products upfront and won’t even lock pricing in until the item has shipped.
When you consider some prices have risen by as much as 20%, it’s a necessary compromise to secure your place in line.
Occasionally prices change:
While we typically can absorb small price fluctuations between signing a contract and installing equipment, that isn’t always the case anymore. So be willing to work with your integrator if a supplier makes a radical price change.
Find your zen place.
Above all, embarking on any construction project right now will require some patience. Dragging a project out is not in anyone’s best interest, so try to be understanding and bide your time patiently. Delays make things stressful for everyone so remember we’re all on the same team and have to work together to bring your project to successful completion.
If you’ve noticed some changes in the weather in the South recently, you’re not alone. The number of severe storms and tornados striking Nashville and the rest of Middle TN has dramatically increased, resulting in a surge in storm shelter construction. While practically speaking, a storm shelter is a great thing to have; these spaces are often only used for a few hours a year.
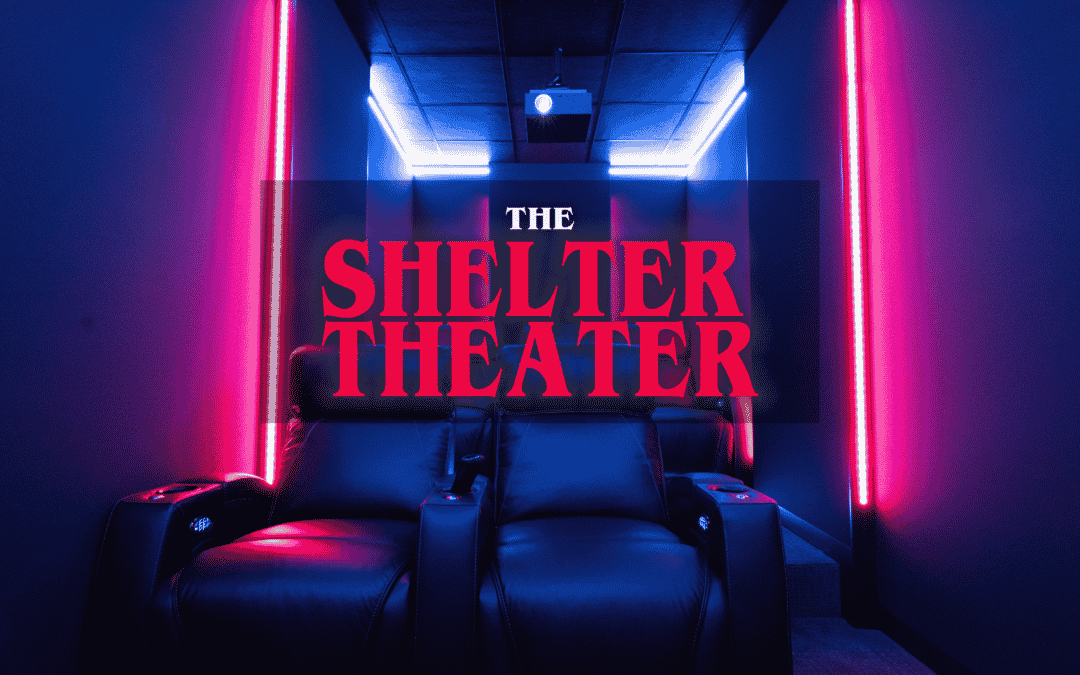
The story of this build begins when our client approached us with the desire to reclaim his shelter space as a proper home theater while taking full advantage of the acoustic isolation provided by the 12″ thick poured concrete walls.
The Shelter Home Theater 32
Home Theater in a (Concrete) box
With a pre-build width of only 96″, space was at an absolute premium. A design requirement of having at least five fixed seats led us to create staggered wall depths in each section of the theater to help squeeze both the seating and speakers in.
CAD Layout of The Shelter Theater
This layout opened the door to employing varying types of acoustic treatments and bass trapping while at the same time creating some visual interest through the use of diffused LED accent lighting.
LED Lighting & Trim Details
The crown jewel of the build is a 104″ acoustically transparent projection screen by Screen Innovations. It’s paired with a light blasting HDR projector from LG that makes high-impact viewing possible, even with the lights on.
Screen Innovations Zero-Edge Pro Projection ScreenCustom Home Theater by Audilux
The room’s soundtrack is voiced by a full accouterment of seven 300 Series in-wall speakers from Focal. All of which are stealthily concealed behind the screen or in the walls around the room.
Illustration showing Left, Center, & Right speakers behind the screenThe Shelter Under ConstructionHidden Speakers & Acoustic Treatments
We wanted to find a way to provide illumination that would be fun but at the same time not distract too much from the theater’s prime directive. Several scenes were created including one inspired by “Stranger Things” (my personal favorite).
A “Stranger Things” inspired lighting themeProluxe LED Lighting & Extrusions
Our client chose a fully motorized option for home theater seating by Octane. Trimmed in top-grain leather and equipped with USB power outlets, underlighting, and plenty of storage, these home theater chairs make it easy to settle into a movie or binge your favorite show.
Lights can be controlled by the keypad on the wall or even turned on and off individually with the Elan remote control.
The process of working with a home technology integrator or AV company on your new home can seem daunting. So much so that even many builders avoid getting involved in the process altogether. While they have an entire army of subcontractors for pretty much anything else, when it comes to technology, you’re lucky to get a shortlist of contractor recommendations. Usually, you are sent off on a harrowing pilgrimage of discovery with nothing more than a prayer that you’ll find a trustworthy soul to enlighten you along the way.
Education is an essential part of our job. If you’ve never had the opportunity to build a custom home before, chances are you might not be aware of the technology that exists, and we try to at least inform you of all of the possibilities. While some things may not ultimately be in your budget, the worst thing that could happen is to find ourselves in a situation where we didn’t mention a product or solution, only for you to hear about it later when it’s too late to include it.
A few of the many hats of your home technology team
As integrators, we wear a lot of hats and can be involved in nearly every facet of the design of your home. If it’s not plumbing or basic electrical, there’s a chance you’ve entered a corner of our Pandora’s box. Whether it’s things that immediately come to mind like AV, home theater, and Wi-Fi, or more leading-edge systems like motorized shades, lighting control, and home automation, the possibilities are dizzyingly endless. Unfortunately, over time, we found there was so much scope to cover that most people didn’t completely understand what they were getting, let alone exactly where anything was going.
BACK TO THE DRAWING BOARD
When we first started the process of rethinking the template for our proposals, I was surprised to see there were no off-the-shelf options for making presentations to clients easy and understandable. So, with a background in graphic design, I decided to invest the time (which admittedly was an easier decision to make during the early days of the pandemic) and create an entirely custom set of icons and graphics that more effectively convey the design of our projects.
The main goal of this investment was to make sure people could easily see what was going where. This approach goes a long way towards ensuring clients understand what to expect when their home is complete and hopefully helps avoid some of those “I didn’t realize this is what you were talking about” moments.
While you don’t have to worry about how any of the magic works, I think it’s critical to provide a clear visual picture of where things are placed throughout the home. We got lots of feedback along the way from clients and family and have further streamlined the process as we’ve gone along. For example, each system is color-coded on the pricing proposal, matching our plans’ icon coloring. So if you see a blue security camera listed on the proposal, it makes it easy to look across and locate exactly where that piece is.
A fresh take on TeCHNOLOGY PLANS
Our new proposals feature easy-to-read icons
At this point, we’ve ended up with an entirely new process for presenting proposals that I feel provides plenty of easy-to-consume information. At the same time, it doesn’t require an electrical engineering degree or honorary Geek Squad nametag. When clients understand what they’re looking at, they can provide meaningful feedback and ask questions that help make us more effective members of your team. It’s been a worthwhile step and helps move us closer to our goal of delivering an experience that’s true “Audio Video Luxury“.
Tip: If you’re brand new to the subject of lighting control systems, I’d suggest you start with this articleto get a basic idea of what’s available.
This post will discuss why you should consider custom lighting control for your home, how much it costs, and why we think Vantage is the best choice for lighting control.
First, let’s take a look at why you’d want to choose panelized lighting in the first place.
Table of Contents
Eliminating wall clutter
Traditional 4 Gang Lighting Bank
While it might sound a little silly at first, living in a large custom home presents quite a few challenges compared to the average 2400 sq ft American dwelling. We’ve all become accustomed to walking into a room, switching on the lights, and not giving it another thought, but things are considerably more complicated in a substantial estate.
As the design becomes more intricate, that single light switch turns into three or four switches and can quickly balloon into multiple banks of four or five switches each.
Suddenly you’re left trying to figure out what controls what, and your guests don’t have a prayer at operating things on their own.
Functionally, it’s incredibly confusing, and cosmetically you’re just expected to live with the “wall acne” that results.
In most homes, each bank of light fixtures (called a load) is connected to an individual dimmer installed in your wall. For example, you might have a chandelier, two strings of recessed lights, pendants, a ceiling fan, a lamp, etc. Each load is controlled by its own dimmer that’s installed in the wall, and it doesn’t take long to see how the wall clutter starts to build up.
Traditional Lighting Illustration
As the room’s size increases, this problem only multiplies.
Panelized lighting offers an elegant and unique solution to this problem…
Panelized Lighting Keypad Illustration
Rather than placing all the wiring and dimming hardware in the room, each load is pulled back to a centralized location or “panel” and then controlled by a compact keypad installed in each room.
Vantage WireLink Dimmers in Panel Enclosure
These keypads offer up to 8 buttons to control individual fixtures, or your system can be programmed to control multiple loads with a single button.
EasyTouch Glass Keypad by Vantage Controls
Each button is custom laser engraved with text to explain its function. The possibilities are endless, but the result is magical.
True custom design options
When you’re investing in your dream home and undoubtedly obsessing over every detail with your designer. You shouldn’t have to spoil your design or be limited to switches that are only white, almond, or black.
Vantage ControlsEasy Touch Keypad
Vantage gives you a vast selection of color and material options and can even custom match trims to any Sherwin Williams paint code.
VantageAdorne Keypad
You can even carry these cosmetic choices across your regular power outlets for a refined and consistent look.
Light switches are something we use over and over every day; why not make them beautiful?
Automation & Integration
Lighting control is one of the key components of what makes up a “smart home”. Fortunately, the Vantage solution integrates perfectly with home control systems like Elan. This allows us to control every light in the Vantage system from within our Elan app or touchpanels right alongside the other features in your home like Video, Audio, thermostats etc.
Scenes like “Party Mode” or “Movie Time” let us bring everything together by setting the mood with the perfect lighting, turning on the music, and even starting up a movie.
Effortless Energy Savings
When something is annoying or hard to use, most people just tend to avoid the activity. In a larger home with 50+ light switches or even multiple wings, this often adds up to lights just being left on rather than spending 15 minutes making the rounds to ensure everything is properly switched off. With lighting control, we’re able to eliminate that task and make things easier in two ways.
The first is we can provide lighting scenes that simplify things dramatically. A button labeled “all off” is installed at your main points of entry. When you press this button just as you’d expect, everything in the house turns off in one motion.
The second way is the use of schedules and motion sensors. We can schedule groups of lights to turn on and off based on the sunrise or sunset. For example, You probably won’t need your landscape lights during the middle of the day or mood lighting flipped on at high noon, but you might want to come home to a safely illuminated driveway after dark. This can both make your home more inviting and create some substantial savings on your power bill.
Vantage Lighting Installation by Assembledge+ and Billy Rose Design (Los Angeles)
You can also incorporate tiny motion sensors and door switches. Using these sensors allows you to turn lights on and off just by walking in and out of a room or opening a door.
Do you have questions or want to find out more about lighting control systems? Don’t hesitate to reach out, we’d love to talk to you about your project!
F.A.Q.
How much can I expect to spend on lighting control?
Panelized lighting certainly carries a premium over traditional switches and dimmers, but it’s not as expensive as you might think. In general, a cost increase of about $4 per square foot is a good rule of thumb, but that number decreases as the size of the system grows.
What type of finish options are available?
White, Bronze, Black, and Titanium finishes are available as standard, but the sky is really the limit. There are additional premium options like Silver, Gold, Oil-Rubbed Bronze, and Chrome, as well as the custom color matching program.
Does this work as part of a home automation system?
Yes! That’s one of our favorite parts of panelized lighting. When paired with a home automation system like Elan, panelized lighting offers all kinds of possibilities.


 35")
 36")
 37")
 38")
 39")
 40")
 41")
 42")